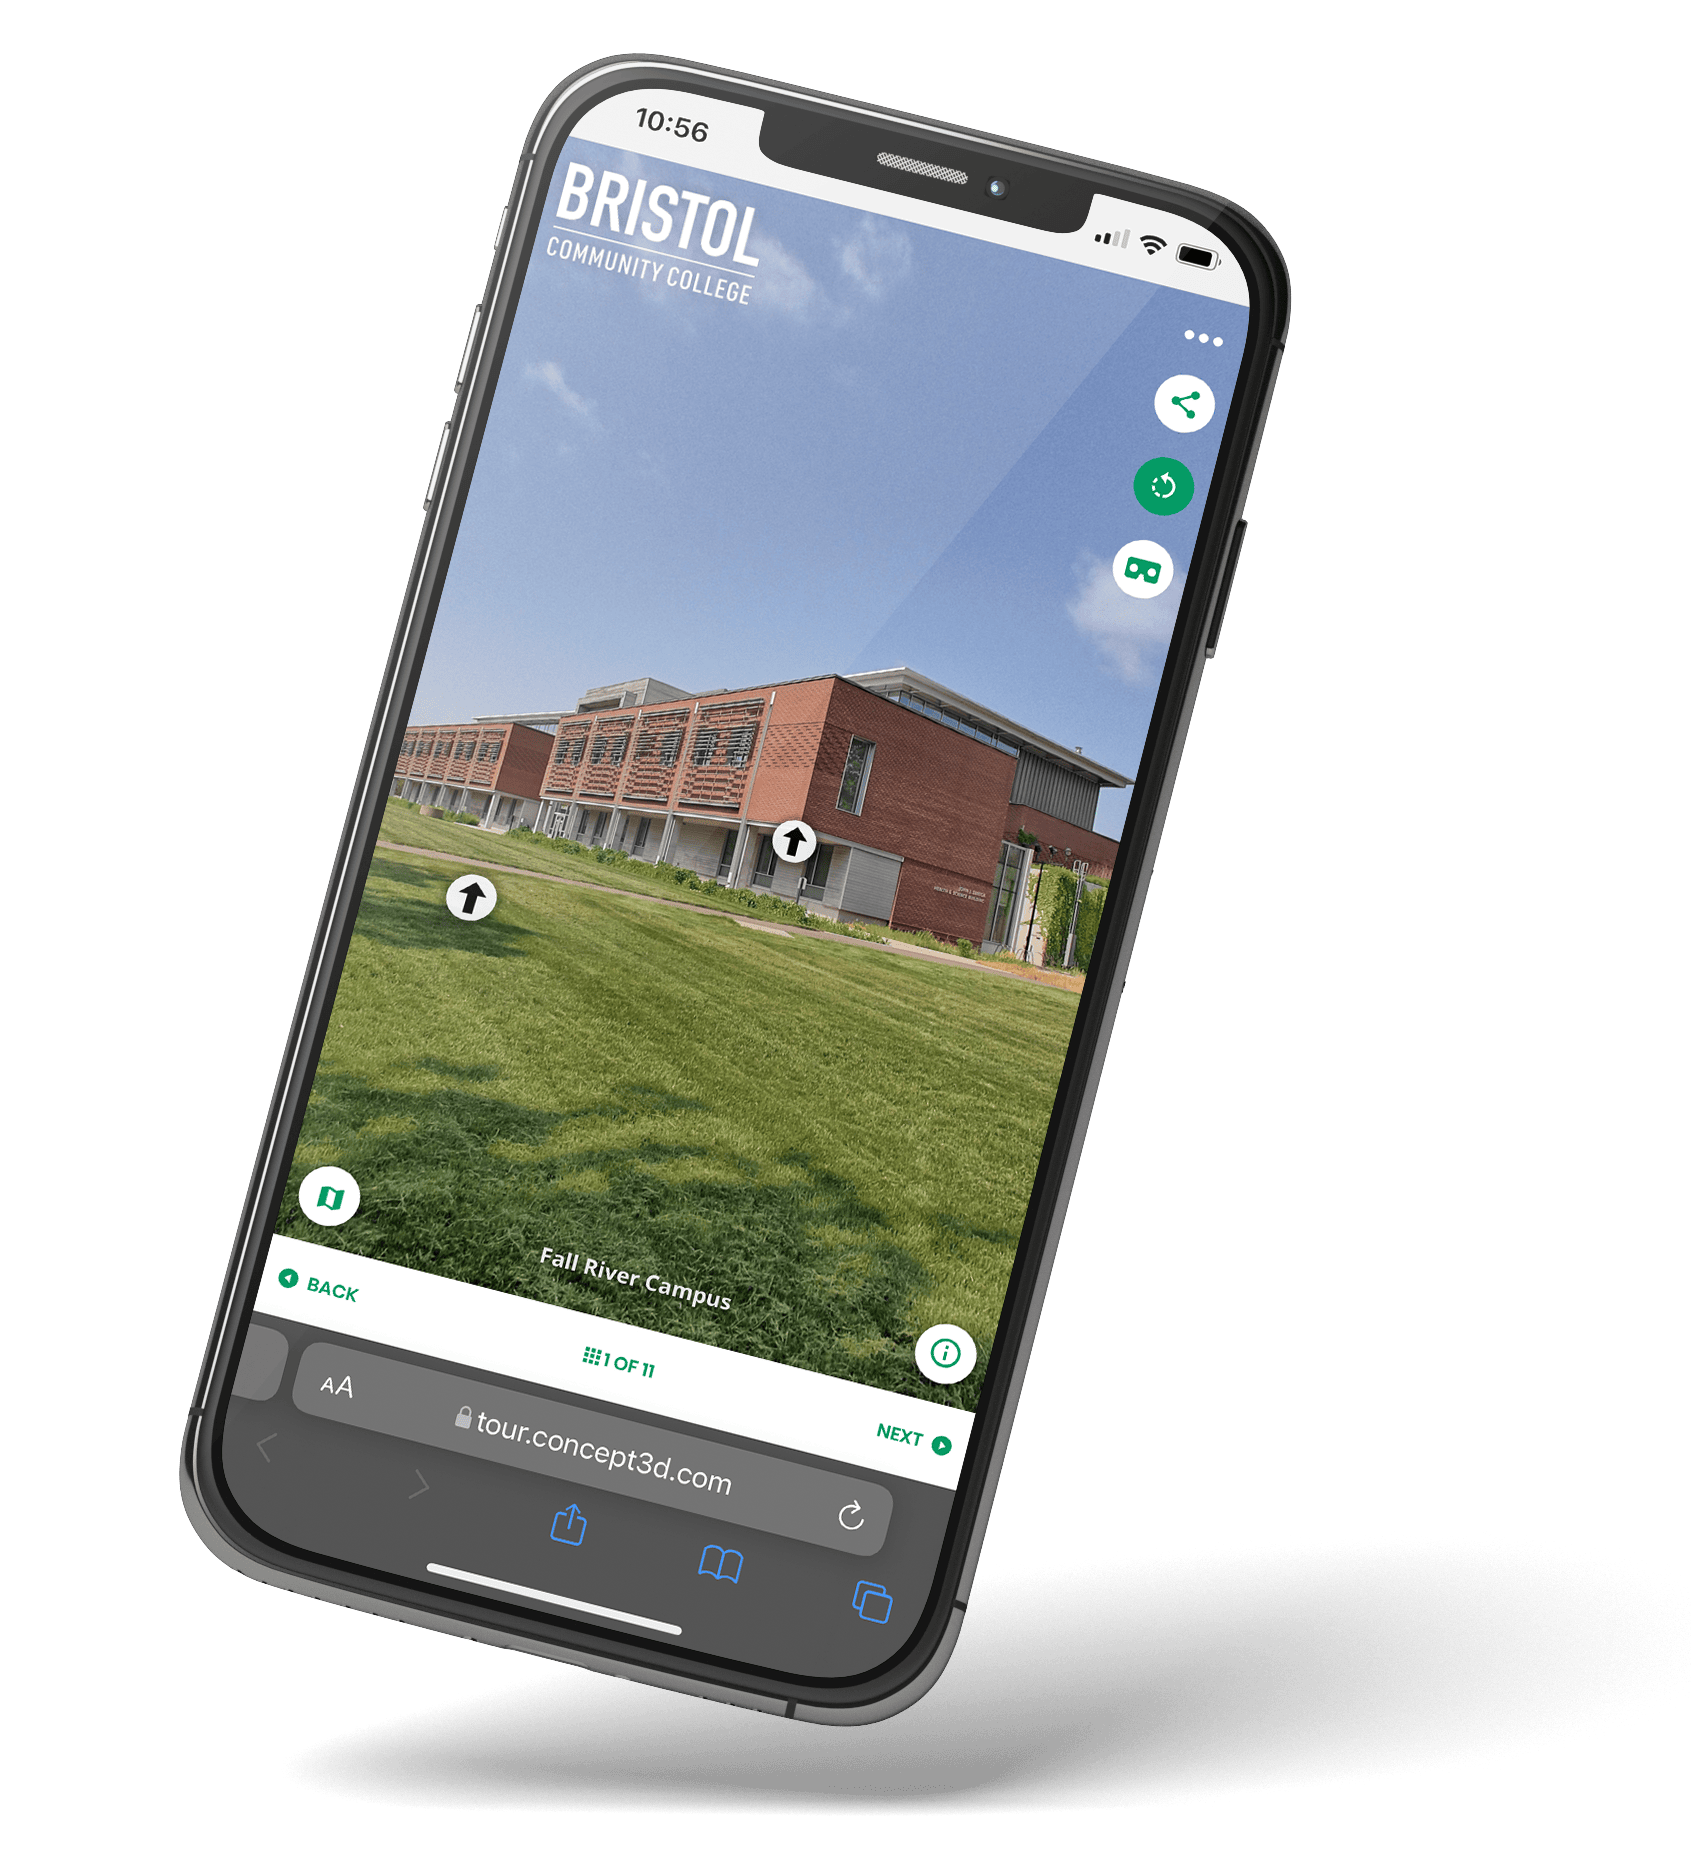
How to Make a Free Virtual Campus Tour

University applications dropped significantly over the last few years. But not all schools are feeling the pain equally. While some universities feel the brunt of the decrease, others are prospering. Some receive record numbers of applicants while others are forced to merge. Or worse – close. Creating a virtual tour of your campus could be the piece of content you need to push students to take the next step.
Thriving universities have perfected answering the ultimate question on every student’s mind – “Can I see myself living here for the next 4 years?” Students want to be sure of this question, and you need to give them content that will answer it. We have found that Gen Z is most receptive to interactive content. There are a lot of studies proving the positive effects of visual, interactive learning and brand perception. But how do you make an interactive experience showcasing your campus?
Andrew Tat, our Product Manager on 360º Tours breaks down how to make a beautiful virtual tour of your campus with just your phone.
Follow along carefully, and be prepared to wow the rest of your admissions and enrollment team.
- Download the Google Streetview app onto your phone
- Take a 360º Panorama via Google Streetview App
- Sign up for a trial of 360º Tours
- Upload your 360º Panorama to 360º Tours
- Add interactive content like hotspots, audio, or text.
- Publish your 360º Tour
- Mobile device (Android or iOS preferred)
- Google Streetview app (free)
- Trial Tour Builder account (free)
Head to your App Store of choice and download the Google Streetview app if you don’t already have it. The Google Streetview app has a built-in 360° panorama camera that makes taking detailed panoramas easy peasy.
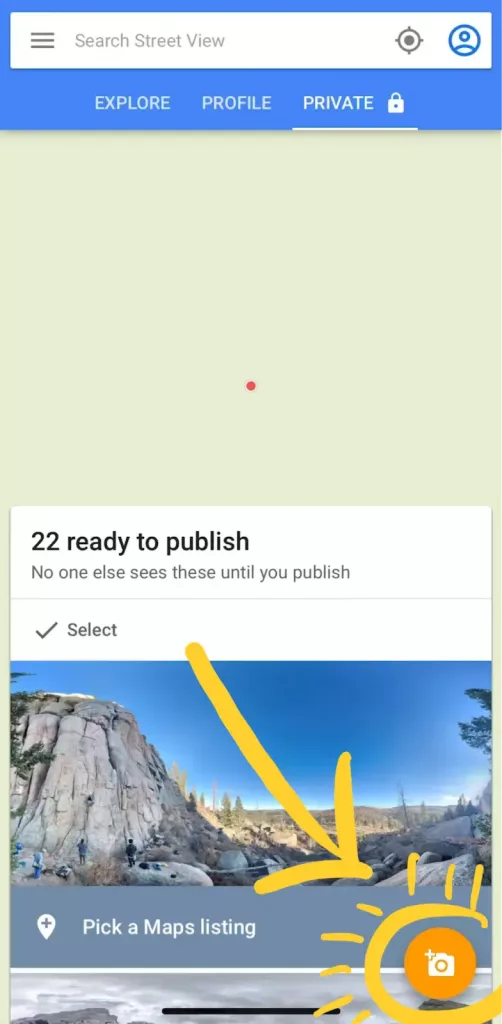
Once Google Streetview is downloaded and you are ready to take a 360° Panorama (aka a Photo Sphere in Google Streetview), open the app and press the camera icon in the bottom right.
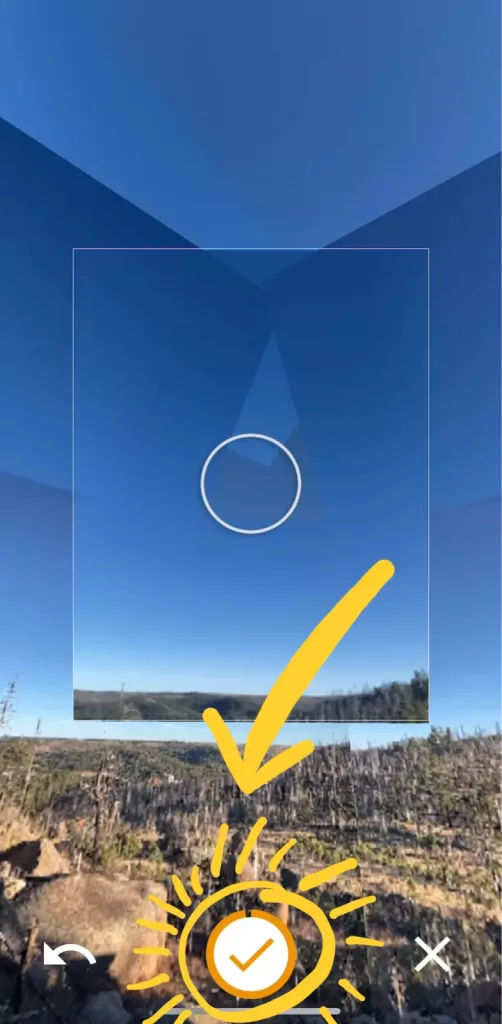
In the Google Streetview app, you should see a rectangle with an orange dot. To take your 360° Panorama, move your phone until it’s hovering over the orange dot. A timer will begin and once done snap a photo for you.
After you snap that first picture, you’ll see 4 new orange dots on the edges of the photo you just took. These dots are guides for where you will want to take photos next.
Hover over each one with your phone and your phone will automatically take a photo and connect it to the last. Continue doing this until you have all 360° degrees covered with snapshots.

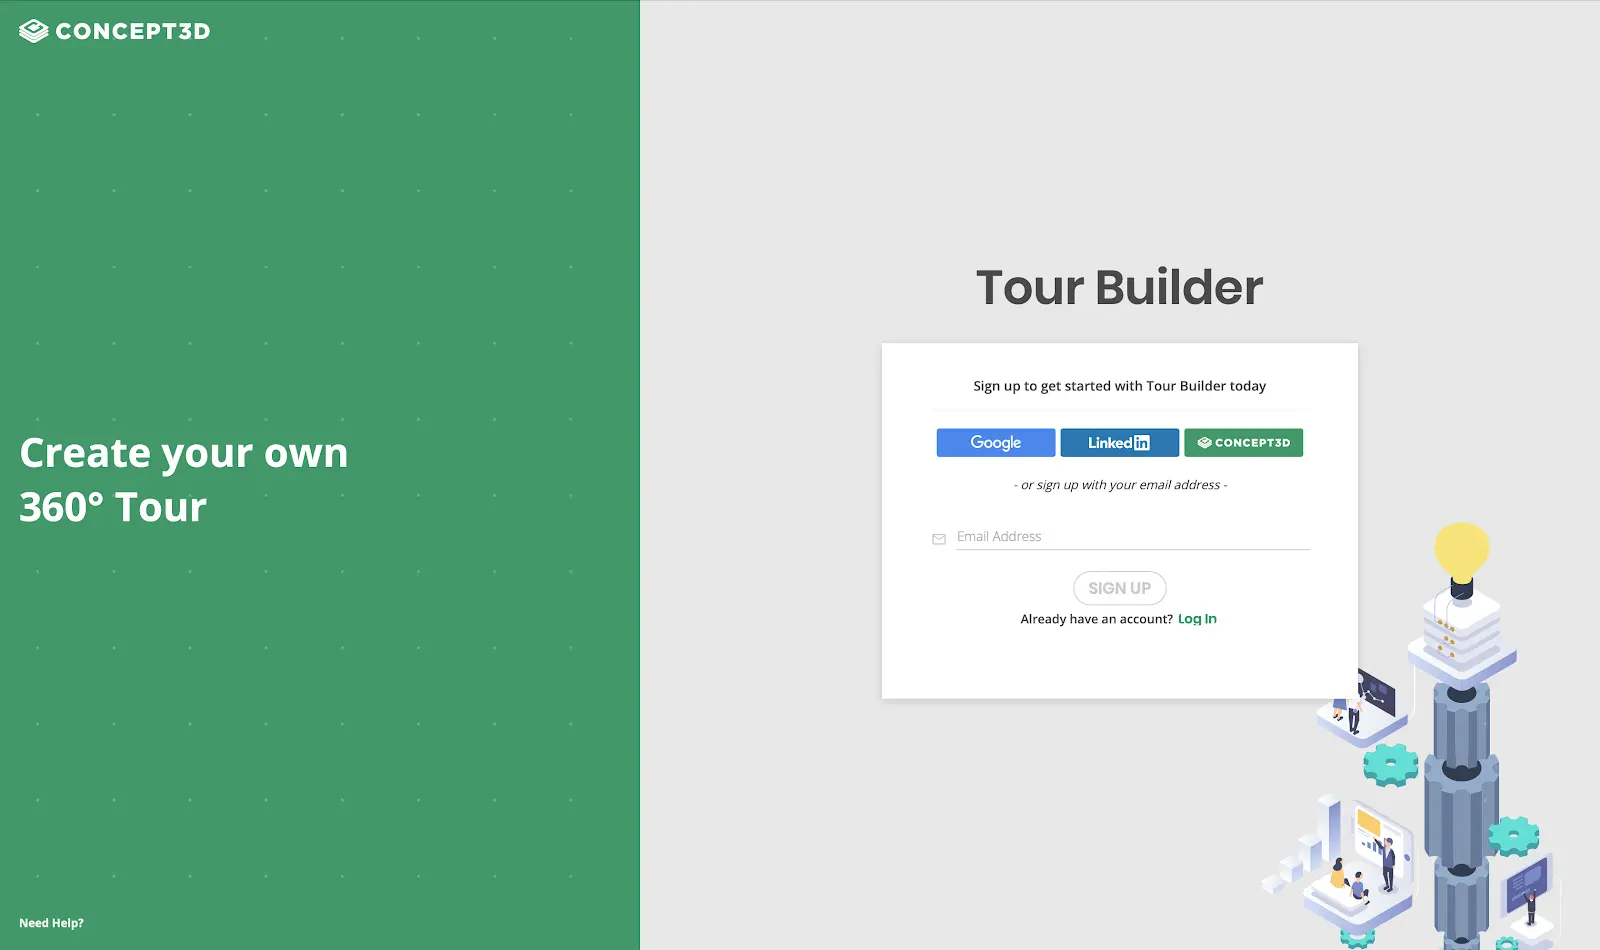
If you don’t already have an account, you can sign up for a free trial of 360° Tour here. If you already have an account, feel free to skip ahead to Step 4.
You can sign up with an email, or you can use your existing Google or LinkedIn account. You’ll be put automatically into a Trial account, which gives you access to Tour Builder for two months to try out.
Transfer the 360° Panorama to your computer. I usually Airdrop or message myself the image.
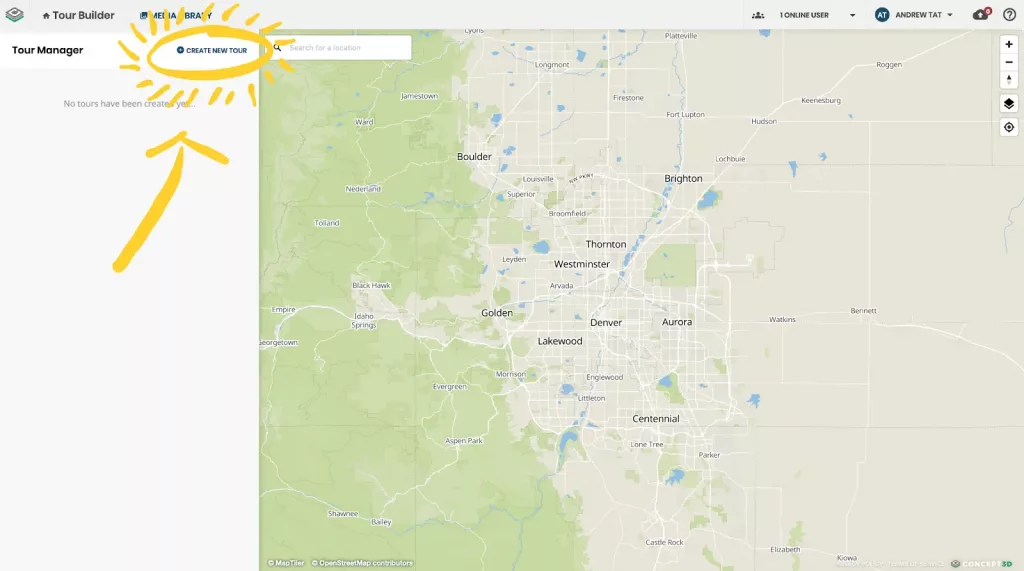
On your computer, log into your Tour Builder account. Create a Tour, give it a name, and save it to start your story.
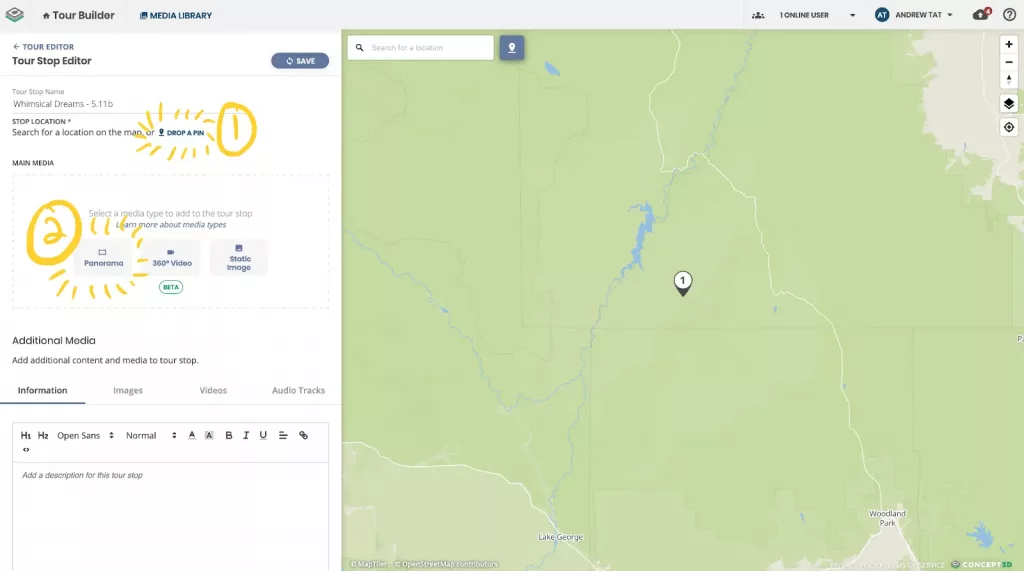
Once the Tour is saved, open the Tour Stops tab and create a Tour Stop. Give the stop a name and a location, then select Panorama as your Main Media type.
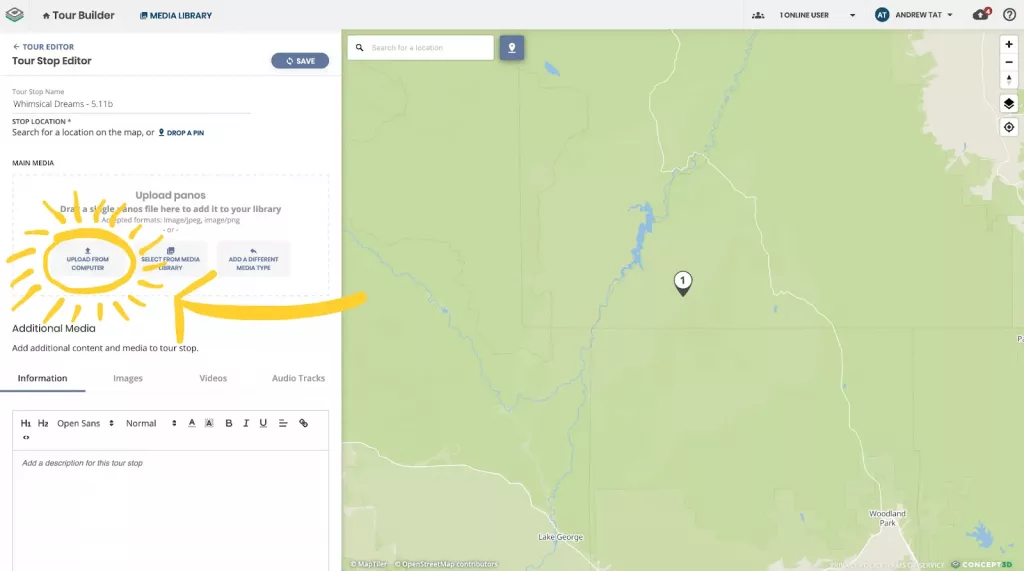
Now Upload from Computer and select the panorama file you just transferred from your phone.
Add some details about where you were at, what were you doing, and who you were with! If you have any additional images or videos from this spot, upload them here to this Tour Stop. They will help add extra color and details about this moment.
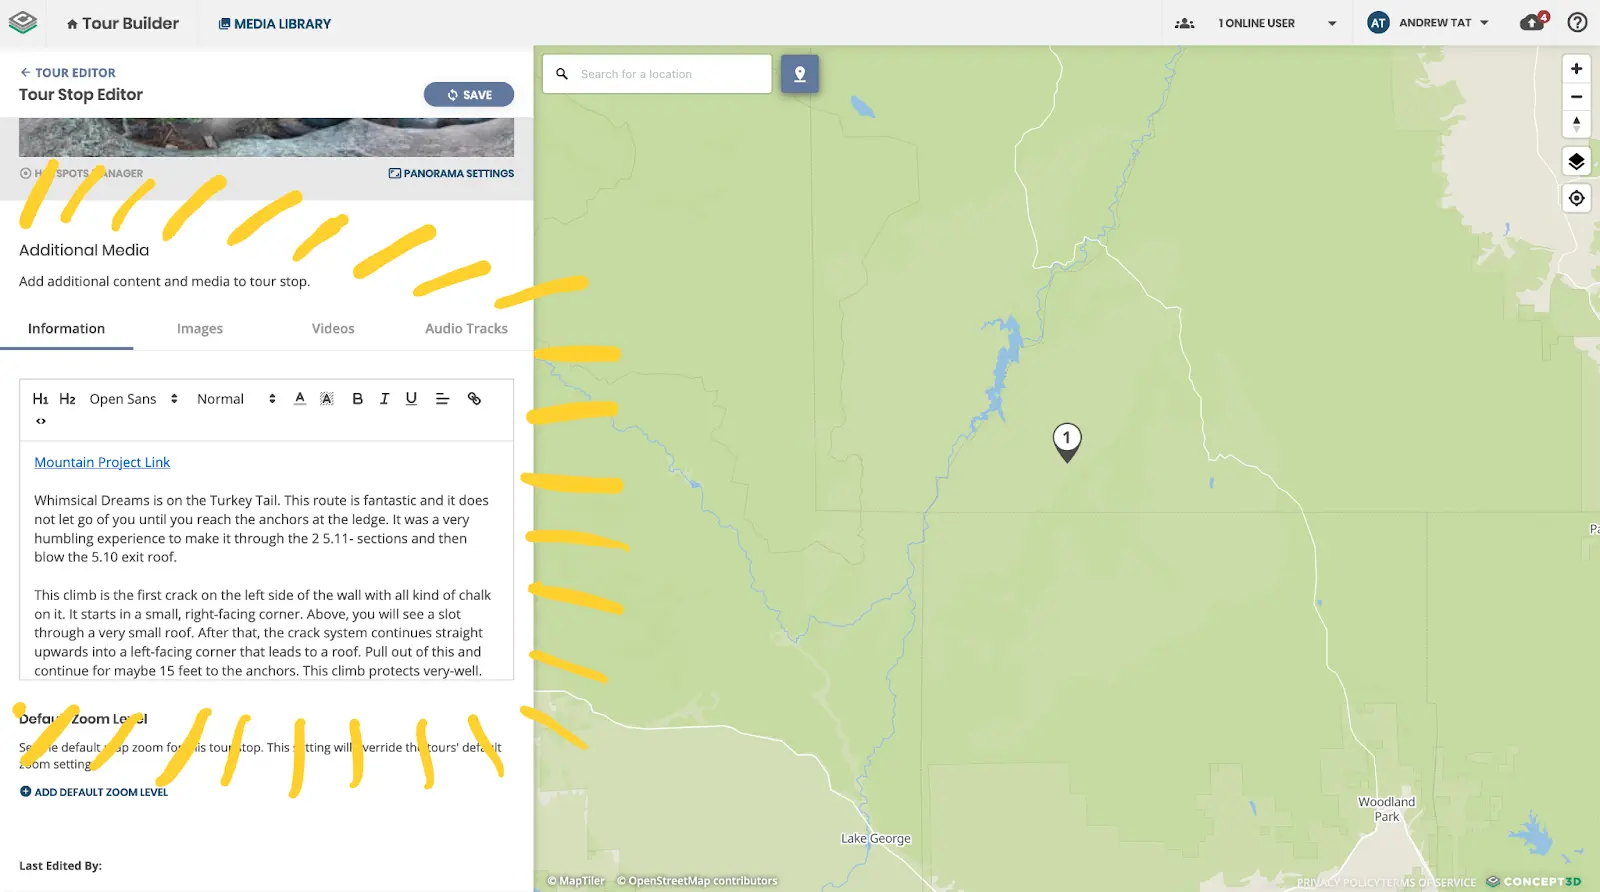
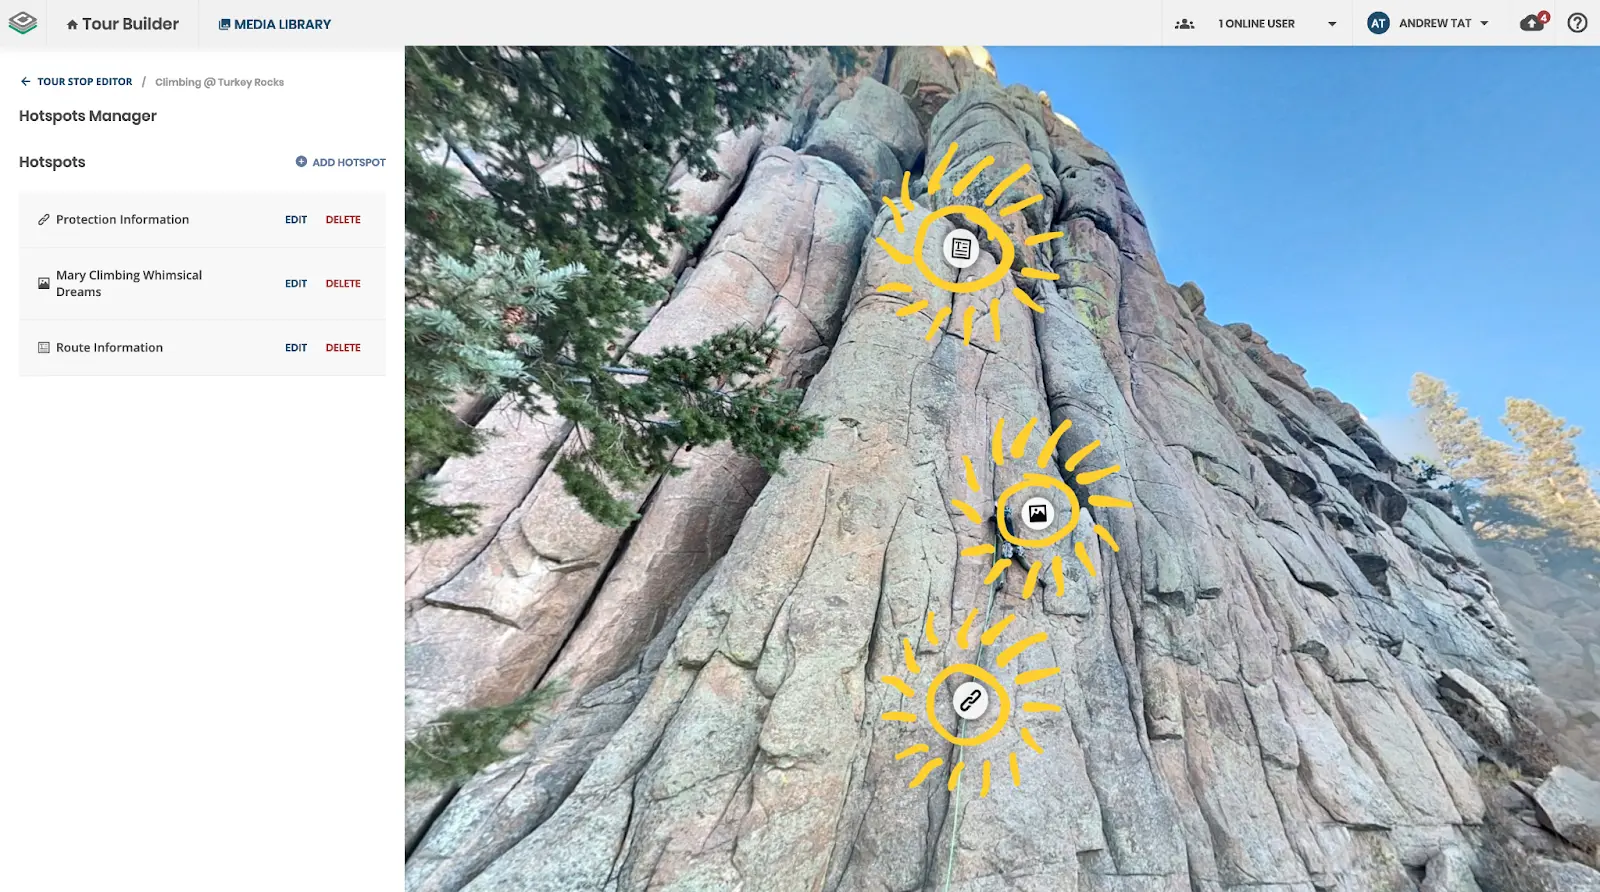
If you have close-up photos or details of specific areas of your panorama, you can jump into the Hotspot Manager and add these as Hotspots on top of your panorama. For example, if you took a panorama outside of a dorm, but you wanted to show off the inside, you can add a hotspot! You can add links, video, audio and text as a hotspot.
Hotspots help you highlight points of interest in your panorama, so get creative and jump into the Hotspot Manager after you save your first round of content!
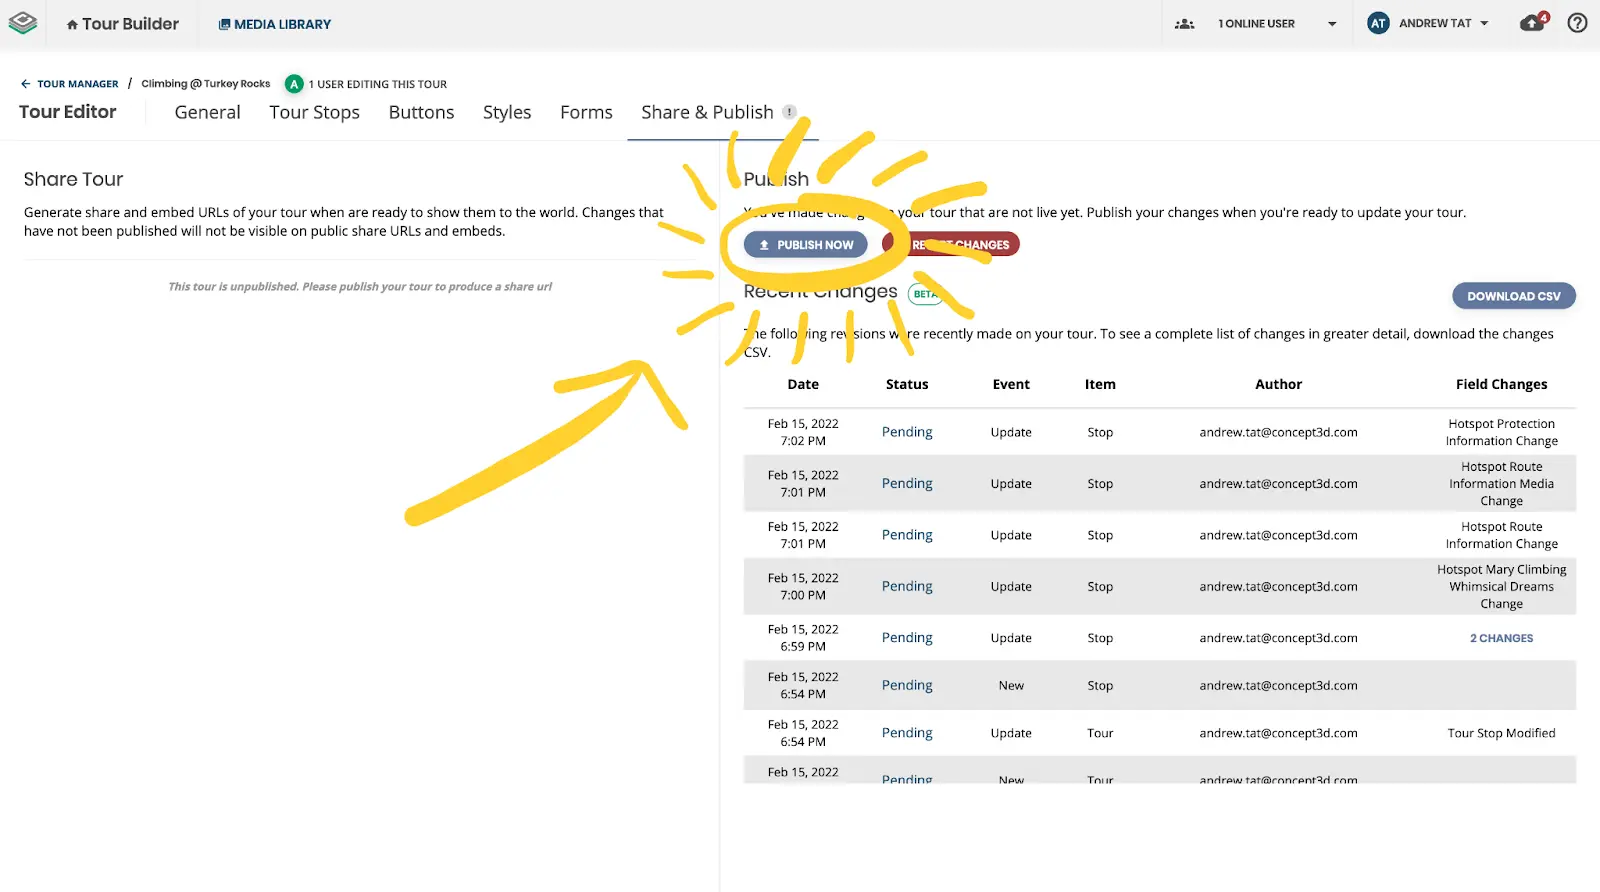
Once you have all of your panoramas and details added, publish your tour! Tour Builder makes it easy to return, preview, and edit content.
Now that your 360º Tour is live, grab the link and share it with your coworkers! Watch them gaze in awe at your work, “you did this with your phone?!” They’ll ask.
